A few weeks ago I quietly celebrating the blog’s 6th birthday with a flashback post on Facebook. 6 years!!! I didn’t do a big post here to usher in the 6th blogoversary on October 9th, but I still figured it was worth mentioning here. And since my brother Scott’s birthday is the week after the anniversary of my first post, I can always count on hijacking his birthday treat to do double duty and celebrate Erica’s Sweet Tooth’s birthday as well. Six years ago one of my first posts was a chocolate peanut butter cake I made for his birthday. The cake is kind of sloppy, the photos show my truly novice abilities at the time, but I will always remember him licking the frosting and absolutely loving that cake. So this year I did an updated chocolate peanut butter layer cake to bring it to the year 2015 with the latest cake trend – naked cakes! – and with my slowly acquired food photography skills as well :)
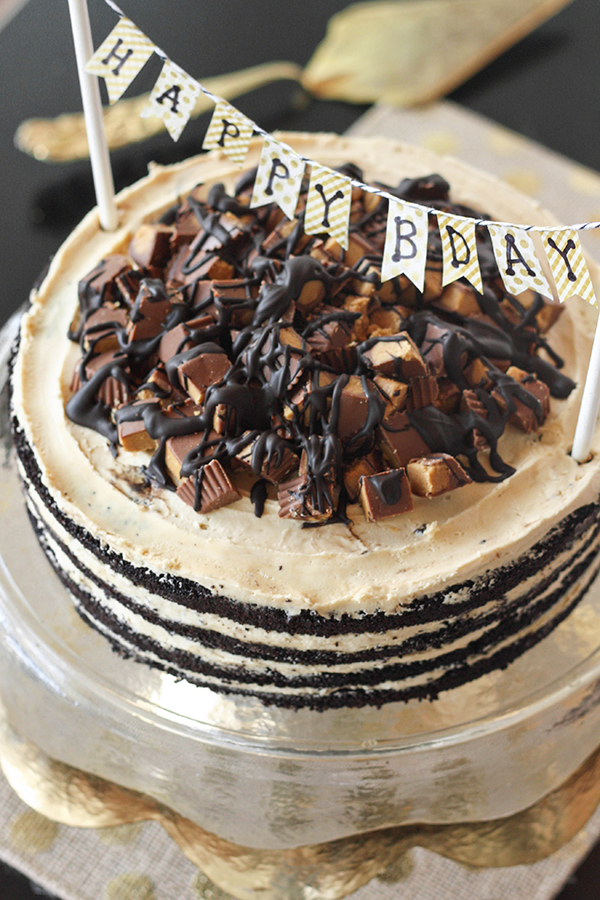
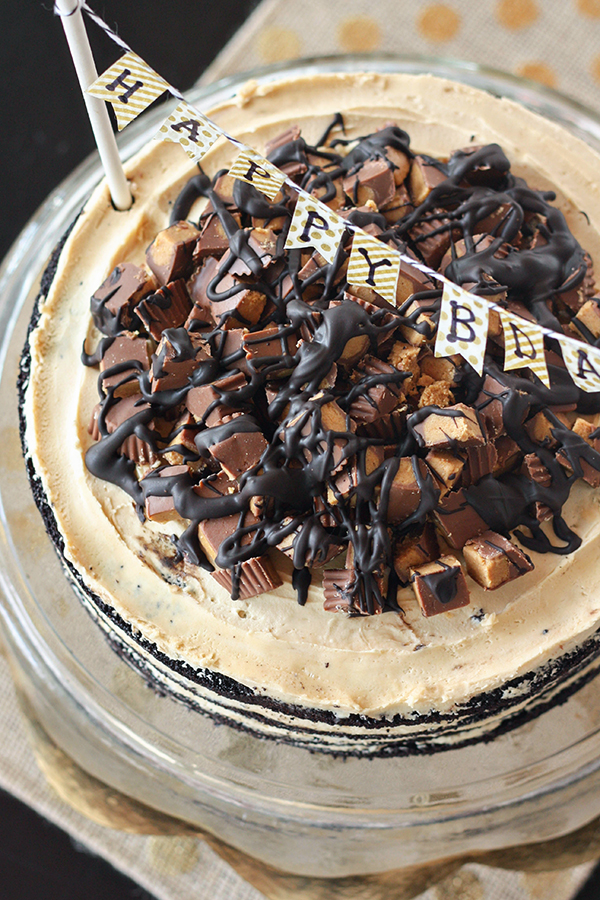
Actually, these photos aren’t a true testament of how much I’ve learned about food photography over the past 6 years because for once I didn’t feel like cutting into a birthday cake prematurely for photos. So instead of a set of 3 unique photos that I usually feature in a post, we have two strikingly similar ones, albeit drool-worthy ones at that. I figured naked cakes are pretty enough on their own that you can see the layers and there’s no need to cut into it for a photo when you can see all the interior yumminess from the outside. I decided to do 4 thin layers of cake (like my beloved Chocolate Hazelnut Mousse Layer Cake) to maximize the amount of frosting, because that’s my brother’s favorite part. It makes for a striking cake that of course is made even better with a giant pile of Reese’s on top. Peanut butter heaven!!
I opted for a whipped frosting for this one since there is so much of it, and peanut butter can be a decadent flavor to begin with. The addition of a little heavy cream and some whipping with the whisk attachment helps lighten up the frosting. The combination is absolutely decadent, as any chocolate peanut butter creation tends to be. Scott loved it (he even ate all the cake this time, not just the frosting!) and even my Dad who isn’t the biggest peanut butter fan cleaned his plate. Without the extra coat of frosting on the sides the cake is much less stressful from a baker’s standpoint, but the end product doesn’t suffer – it’s still gorgeous! Happy Birthday Scott, Happy Birthday Erica’s Sweet Tooth, and happy peanut butter and chocolate to everyone else!!
Chocolate Peanut Butter Naked Layer Cake
Ingredients:
for the chocolate cake:
1-3/4 cups all purpose flour
2 cups sugar
3/4 cups cocoa powder (I used Hershey's Special Dark)
2 tsp baking soda
1 tsp baking powder
1 tsp salt
1 cup buttermilk
1/2 cup vegetable oil
2 large eggs
1 tsp pure vanilla extract
1 cup freshly brewed hot coffee
for the whipped peanut butter frosting:
24 tbsp (3 sticks) unsalted butter, at room temperature
1 cup creamy peanut butter
2 tbsp vanilla extract
5 cups confectioners' sugar
3 tbsp heavy cream
for decoration:
10 Reese's peanut butter cups, chopped roughly
4 oz dark chocolate chips
2 tsp cocoa powder (I used Hershey's Special Dark)
Directions:
for the chocolate cake:
Preheat the oven to 350 degrees. Prepare two round 8" cake pans by spraying with nonstick spray and sprinkling lightly with flour.
In a medium bowl, whisk together the flour, sugar, cocoa, baking soda, baking powder, and salt.
In the bowl of an electric mixer, beat the buttermilk, oil, eggs, and vanilla until well mixed. With the mixer on low speed, slowly add the flour mixture and mix until just combined. With the mixer still on low, add the coffee and stir just to combined. The batter will be very thin, this is normal!
Split the batter evenly between the prepared pans and bake for 35-40 minutes, or until cake tester comes out clean. Allow cake to cool in the pans for 30 minutes, then turn them onto a wire rack to cool completely.Once cooled, use a large serrated knife to evenly split each layer into 2 and level off any domes from baking.
for the whipped peanut butter frosting:
In the bowl of an electric mixer, beat together the butter and peanut butter on medium-high speed for 2-3 minutes, until light and fluffy. Add the vanilla and beat until incorporated. Reduce the mixer's speed and slowly add the sugar. Once the sugar is incorporated, increase the speed to medium and beat the frosting for another 2 minutes. Add the heavy cream, switch to a whisk attachment, and mix again for another 2 minutes. Transfer some frosting to a piping bag fit with a large star tip and leave most of it in the bowl.
for assembly and decoration:
Lay one layer of the chocolate cake on a cake circle or your desired serving plate and pipe a ring of frosting along the edge. Use an offset spatula to fill in the rest of the frosting in an even layer. Place another layer of cake on top of the frosting and repeat until all cake layers are added. Once the last layer of frosting is added to the top, use an offset spatula to gently make concentric rings on the frosting for a rustic design.
Place the pile of chopped Reese's on top of the final layer of frosting, pressing gently into the frosting to secure them. Melt the chocolate chips in the microwave in 30 second intervals, mixing well between each interval, until completely smooth. I wshiked in a bit of cocoa powder to deepen the color of the chocolate to match the cake layers (OCD, much??). Drizzle the melted chocolate over the Reese's candy until you're happy with how it looks. Place cake in a cake carrier, container, or wrap gently in foil or plastic wrap and store in the fridge until ready to serve. Allow the cake to sit on the counter for an hour or two before serving to come to room temperature.



Thank you, this is very useful information for me, I am going to use it soon!