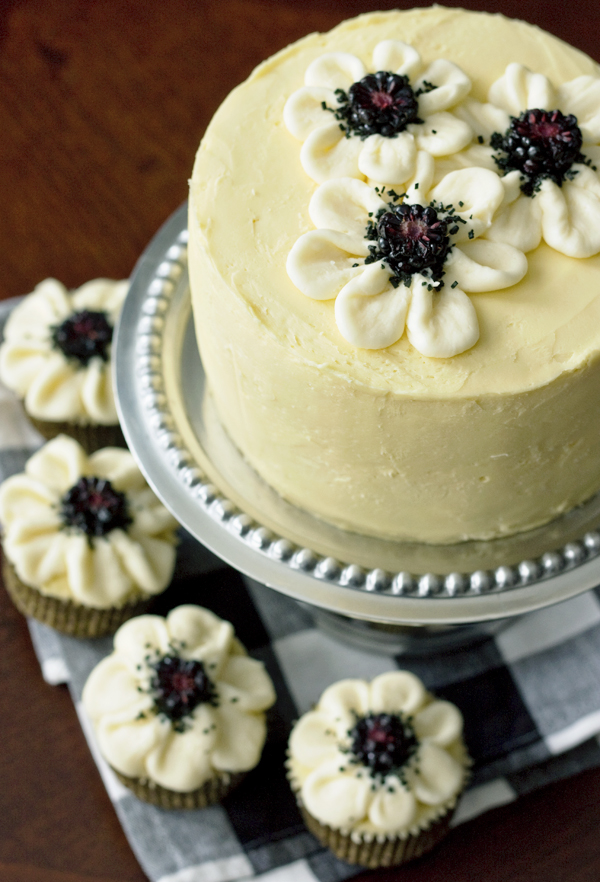
Happy Spring!! I say that with a tinge of sarcasm as we still have a full coverage of snow here in Connecticut, but I would say things are looking up weather-wise. And if not, I’m leaving for Florida tonight for a few days of vacay so who cares! I’m celebrating spring regardless of what it looks like outside because I’m just so freaking excited for all the things that are associated with this season. I’m sick of my winter wardrobe, done with boots, ready for ankle pants, ballet flats, and plenty of bright colors. In terms of food, I’m celebrating with an obvious choice – buttercream flowers. But not just any kind of flowers, anemones! This variety of bloom is very popular over in Pinterest-land and I am guilty of following trend and falling in love with them too. Definitely expect to see some in my wedding arrangements! So when I saw a tutorial for how to make anemones out of frosting and blackberries in the Best of Martha Stewart Cakes and Cupcakes magazine, I knew they’d make an appearance here on the blog. So go ahead and start bringing on the Spring 2013 trends with some floral jeans, neon accessories, bold stripes, and of course, anemone cupcakes!
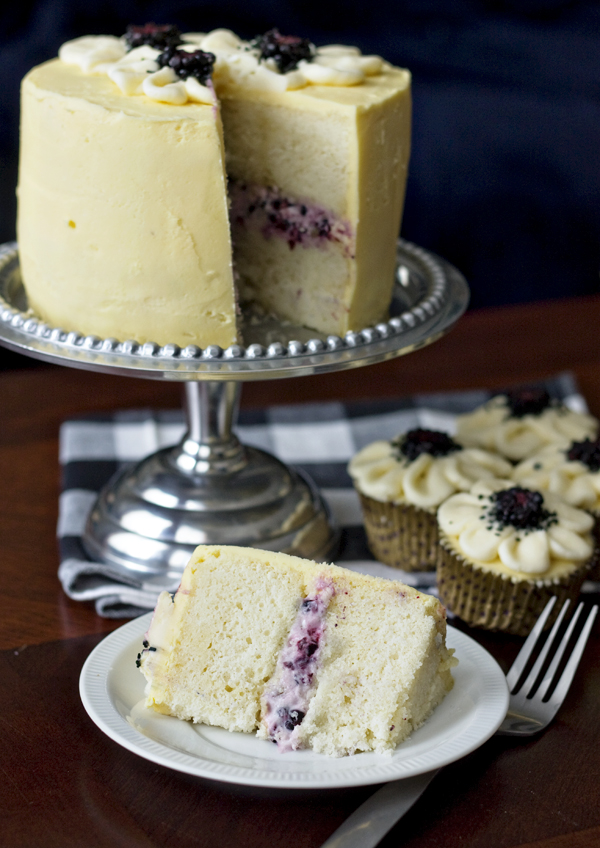
I actually made this cake for my birthday a few weeks ago. And yes, I know it’s ridiculous to go through the trouble of baking a cake for your own birthday, but when you enjoy these types of things as much as I do, it’s definitely more of a treat than a chore. I was still looking for a go-to vanilla cake recipe when I set out to make this cake, and now I am proud to say I’ve found my cake! I’ve always been a vanilla-vanilla girl, so I was so happy to find a homemade version that delivered so well. There are a lot of recipes out there that claim to be the “best” white cake, and I can’t say I’ve tried a gazillion recipes, but this one was really, really good. The method of making the batter was a little foreign to me, but I’m pretty sure whatever made it so different had to do with the excellent results. A nice delicate crumb, soft texture, and a beautiful white color. I paired the white cake with a blackberry-marscapone filling to tie in the blackberry flowers and I thought it all worked beautifully together. Normally my instinct is to lean towards a cream cheese-based filling, but it was my birthday so I was feeling glamorous and splurged with the mascarpone. The outer frosting is just simple buttercream dyed yellow because, well, I love yellow!
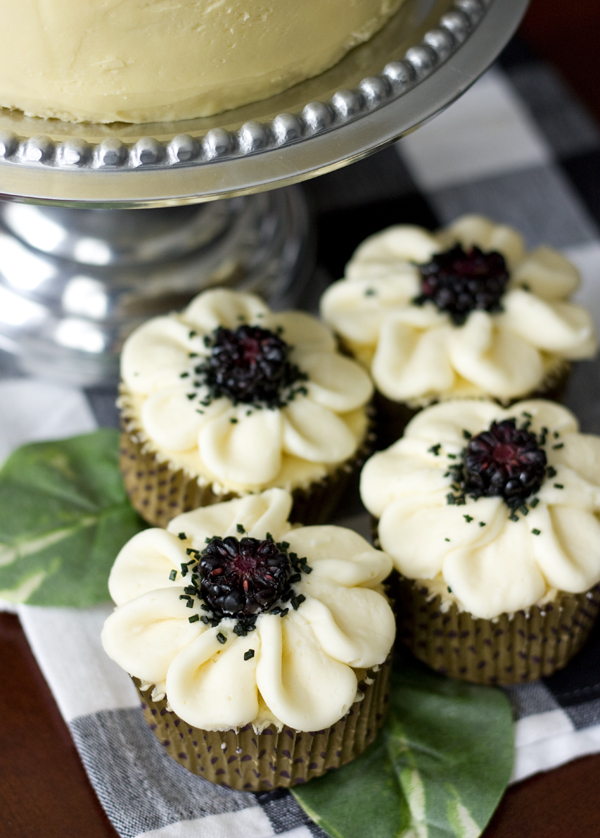
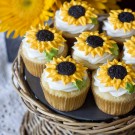
The cake recipe is for an 8″ cake, but I decided to make a 6″ one instead and bake the rest of the batter as cupcakes. I’m glad I did because I think the anemones as cupcakes are absolutely adorable. I could totally see these taking center stage at a party, shower, or even wedding! The great thing is that they’re really SO easy to make. You do need a special petal frosting tip (I used this #127 from Wilton), but once you have that it’s really pretty straightforward. Watch this video tutorial by Savory Sweet Life for a visual reference on piping petals. Then I sprinkled some black sanding sugar in the centers and set half a blackberry on top of each one, cut side up. I have no idea how many petals anemones are supposed to have, and I know they’re generally more mutli-layered and textured, but these look pretty darn close and I hope no one’s counting!
Vanilla Cake with Blackberry Mascarpone Filling
Cake recipe adapted from i am baker
Yield: 1 8" cake or 1 6" cake + 8 cupcakes
Ingredients:
for the white cake/cupcakes:
2-1/4 cups cake flour
1 cup milk, at room temperature
6 large egg whites, at room temperature
1 tsp almond extract
2 tsp vanilla extract
1-3/4 cups granulated sugar
4 tsp baking powder
1 tsp salt
1-1/2 sticks unsalted butter, at room temperature, cut into cubes
for the blackberry mascarpone filling:
8 oz. mascarpone cheese
1/2 pint blackberries
4 tbsp powdered sugar
1 tsp vanilla extract
for the vanilla buttercream:
1 cup unsalted butter, at room temperature
4 cups powdered sugar
3 tbsp milk
1 tsp vanilla extract
for decoration:
Handful of blackberries cut in halves
Black sanding sugar
Petal decorating tip
Directions:
for the white cake/cupcakes:
- Preheat oven to 350 degrees and grease 2 8" cake pans, or 2 6" cake pans + 8 muffin tins with cupcake liners.
- In a medium bowl, combine milk, egg whites, almond extract, and vanilla extract and beat with a fork or whisk until blended.
- In the bowl of an electric mixer on low speed, mix the cake flour, sugar, baking powder, and salt. Add the cubes of butter a few at a time, continuing to beat on low speed for another 2-3 minutes.
- Slowly add all but 1/2 cup of the milk to the flour mixture and increase speed to medium for 1-2 minutes. Add the rest of the milk and continue to beat for another minute.
- Pour batter evenly among the cake pans and fill cupcake liners 2/3 of the way full if you're using them. Bake the cake for about 27 to 30 minutes and the cupcakes for 20-23, or until a cake tester comes out clean.
- Allow the cake to cool in the pans for 10 minutes, then transfer to a cooling rack to cool completely.
for the blackberry mascarpone filling:
- In a medium bowl, combine the mascarpone cheese and blackberries and use a rubber spatula to gently incorporate the berries.
- Add the powdered sugar slowly, then the vanilla, and continue to fold gently by hand until evenly distributed.
for the vanilla buttercream:
- In the bowl of an electric mixer, beat the butter for 2-3 minutes until light and fluffy.
- Add the powdered sugar 1/2 cup at a time and beat well until completely mixed. Add the milk and vanilla and continue to beat for another 1-2 minutes until smooth.
- Transfer about 1/4 of the buttercream to a piping bag fit with a coupler tip to do the flowers and dye the rest your desired color for the cake.
for assembly and decoration:
- Level your cake layers and transfer the bottom layer to a cake circle or cake plate. With a large round tip, pipe an outline of vanilla buttercream on top of the layer and then fill the circle in with the blackberry mascarpone filling. The buttercream creates a nice dam for the filling so it doesn't leak out.
- Stack the other layer on top and apply a crumb coat of buttercream frosting to the entire cake. Place in the fridge for 5-10 minutes, then complete your final layer of frosting.
- For the anemone flowers, put a large petal tip on the coupler of the buttercream frosting and pipe a number simple flowers on the cake (I suggest watching this video tutorial by Savory Sweet Life). Sprinkle the centers with black sanding sugar and place a half blackberry on each cupcake, with the cut side up.
- For the cupcakes I cut out cones from the center of each one and filled them will the blackberry mascarpone filling. Then I frosted them with a thin layer of yellow buttercream before piping on the anemones.




Hi Erica,
Your cake is beautiful!
I have a question about your frosting…1 cup of butter to 4 cups of powdered sugar…sounds extremely sweet…does it form a crust?
Thanks.
Erica — March 21st, 2013 @ 3:58 pm
It is a very sweet frosting, but that’s what you’ll get from a traditional American buttercream. I chose to only frost the outside with that buttercream and did a less sweet filling to offset it a bit. It’s not too sweet when it’s all together!
I just want to let you know that I absolutely LOVE your blog… I have used so many of your ideas people are starting to think that I have become a baker on the side, instead of a midwife. Keep up the beautiful work on this page, and i will return for sure again and again!
I can’t wait to try this recipe out!
My gosh, Erica! A beautiful cake!! I just got my copy of Martha’s book and when I saw your pics I knew right away that I needed to learn to make those flowers. Thank you so much for posting this and including the video link. I can visit Sur La Table tonight and get a pedal tip. I know, a real tough job. :) I’m thinking I would like to make the poppies with red frosting. Thanks again!
Hi Erica! I love your blog and I saw your email today and had to try it for myself tonight. I had mixed results with the consistency of the blackberry filling. Mine was wayyy looser than the one shown in your picture. In your photo your filling wasn’t flowing out and you could actually see the creaminess. Mine didn’t come out that way and I followed the directions to the tee. Do you have any advice? Did you have to try it out a couple times before you got it the way you wanted it?
Erica — March 23rd, 2013 @ 2:42 am
Hi! I’m SO sorry, I realized after I saw your comment that I wrote the recipe out wrong. I’ve changed it now, and you definitely need more powdered sugar to stiffen things up. I did actually have to play around with the recipe, and that’s why it was wrong at first. I hope you still were able to enjoy it!
Wow your cake looks so gorgeous! Vanilla cake with blueberry mascarpone filling sounds just divine!
Oh I love the flower frosting! So beautiful! Thanks for sharing some tips! I would love to decorate my cupcakes like that. (probably with a lot of practices!)
I looked at I am Baker’s recipe…she has 4 teaspoons baking powder, whereas your recipe has 4 Tablespoons baking powder (for the cake).
Is your recipe correct, as written?
Thanks.
Erica — March 23rd, 2013 @ 7:40 pm
I think I was really tired when i wrote this post – this is my 2nd typo! Sorry, yes 4 teaspoons is the proper amount, tablespoons is way too much. Thanks for helping me see the mistake!
I tried making the filling first…even with 3 cups of powdered sugar, but unfortunately it was the consistency of cake batter and sweet enough at that point. Oh well, the cake is still beautiful and we learn as we go! I know that all too well!
I did make the cake, but followed i am bakers recipe. I tried the marshmallow frosting from her site, but too sweet for my taste. I ended up making a sour cream frosting with coconut.
Keep up the gorgeous work, Erica!
Happy belated birthday! And what a beautiful cake!
Hi!
I am totally planning on making this for mothers day next sunday but i have a question about your cake! Did you use two 6″ cake pans or did you just make one and layer it in half??
I love how the cake looks with the cupcakes! Problem here is i only have like ten, 8″ pans and no 6″, guess i have to invest in some..
Thanks!!
Paige
Erica — May 3rd, 2013 @ 1:51 am
I used 2 6″ cake pans. You could totally do an 8″ cake with this recipe, but you won’t have any leftover for cupcakes. And then if you divide each of the 8″ layers in half for a 4 layer cake, it’ll be taller than if you just left it at 2. More work (and you’ll need more frosting/filling) but that’s what you’d have to do if you didn’t buy 6″ pans. I loooove my 6″ pans though so I highly recommend it :)
Beautiful cake! I decided to try it after seeing the Pinterest “fail” version because I couldn’t believe someone butchered it that badly.
Truth be told, this is the first cake I’ve
made from scratch and with no mixer! It turned out perfectly except that there was so much filling. I only used a bit if it and would liked to have used more but it started leaking out the sides even though I piped out the frosting to form a wall as directed. Is there another way to avoid this? Other than that, it’s delicious!
I made this recipe and it stuck to my pans even though I greased and floured them. Did I do something wrong?
Erica — January 11th, 2014 @ 10:17 pm
Hmmm not sure why that happened. Sometime to be safe I spray with Pam or similar spray as well so maybe next time try that out!
Hi all, Erica love your cupcakes and cakes. Just a tip, I’m from Italy and we use mascarpone a lot. To maintain that thick creamy texture NEVER beat/whisk it. Simply fold the slightly crushed berries in the mascarpone then the sugar. Put in the fridge at least an hour before using. It shouldn’t become runny. Ciao
The cake looks really good in your picture but mine didn’t come out well at all. The cake fell apart when I tried to remove it from the pan. This was even after I greased the pans like stated in the recipe. I had to try and piece it back together. The edges of the cake were hard but the center was really sticky. The Blackberry filling was sickening sweet. Did you really mean to write 3 cups of sugar? I literally could only taste sugar. And the butter crème was really good, but the recipe didn’t make enough to cover the entire cake. Unfortunately, I ended up just throwing the cake out. Maybe I did something wrong?
Erica — September 21st, 2014 @ 9:28 pm
Hi Anthony, I’m really sorry you had this difficulty with the cake. You’re actually not the first reader. So I went back to the drawing board this weekend and tried to recreate a better filling. My adjustments are made above and still yielded a nice spreadable filling that has plenty of mascarpone flavor without too much sweetness (thus much, much less sugar). As for the cake, I’m not sure why yours didn’t work out. I’ve had repeated success with the recipe. Maybe we have different ovens!
I appreciate your feedback and I hope this updated recipe will be more of a hit!
I used to bake cakes for people and I found if you use half butter and half crisco (which now comes in sticks), the icing wasn’t as sweet, but still had all the flavor consistency as using all butter.
I was just curious… Because of the mascarpone filling, does this cake need to be refrigerated?
Erica — February 15th, 2015 @ 9:22 am
Yes, the cake should be refrigerated before serving. You can leave it at room temperature for an hour or so, but no longer than that. Enjoy!