I envy the bloggers that have been posting festive Thanksgiving recipes for the past few weeks. I didn’t have the foresight this year to make fall/turkey-themed treats to share with all of you in time for your turkey day preparations. Thanksgiving definitely crept up on me this year! (It might have something to do with the massive amounts of microbiology being thrown at us recently) But if you’re last-minute like me and looking for a sugar cookie idea for Thursday, I’ve got just the one — maple flavored maple leaf sugar cookies decorated in fiery fall colors:
This design allowed for a lot of freedom (and forgiveness) since there aren’t many intricate details like with snowflakes, Easter chicks, or engagement rings. The whole point with these is to be messy and make organic-looking patterns seen in nature. Every leaf is different, so you don’t have to worry about meticulousness here. I’m normally pretty controlling when it comes to royal icing decorating, but with these I even let Ryan try out a few. In other words, these cookies would be a good way to get the kids and even boyfriends/husbands involved in dessert prep.
It took Ryan and I some trial and error to figure out the best way to achieve the right mottled look, and this is what we eventually settled on. First of course you have to line each cookie with a thicker-consistency icing to make a barrier before you flood with the thinner consistency. I dyed 2/3 of my icing a reddish orange and 1/3 of it golden yellow, using the red to outline. Once the outline was dry, I made a bulls-eye design of alternating red and yellow with the flooding icing. Don’t worry about these layers bleeding into each other a little as you pipe because that’s what you’re going to end up doing anyway. To blend the colors, I used the tip of a small offset spatula to gently mix the layers, but you can use a toothpick if you want to be more precise. I’ve used my extensive Paint skills to help share the method below since I didn’t have my camera on hand as I was making these last night. The arrows represent the motions I used with the spatula to mix the colors, making sure to move in both directions all around the leaf, starting and ending in the center. Finally, I went back while the icing was still wet to pipe in some veins to make them more realistic.
Maple Leaf Sugar Cookies
For the cookies:
1-1/2 cups butter, at room temperature
1-1/2 cups granulated sugar
1/2 cup brown sugar
2 eggs
2 egg yolks
4 tsp maple flavoring
1 tsp vanilla extract
4 cups all purpose flour
1 tsp salt
1 tsp baking powder
For the royal icing:
1 pound powdered sugar
5 tbsp meringue powder
1/3 cup water (plus more for adjusting consistency)
Few drops maple flavoring
– Beat together butter and sugars in the bowl of an electric mixer until light and fluffy, about 2 minutes
– Add the egg and egg yolks one at a time, beating until smooth. Add maple flavoring and vanilla
– In a separate bowl, whisk together the flour, salt, and baking powder
– Add the dry mix to the wet slowly with the mixer on low speed, just until combined
– Wrap dough in saran wrap and chill in the fridge for at least 2 hours (I let mine chill overnight)
– Preheat oven to 350 degrees
– Roll out dough with plenty of flour and cut with a maple leaf cookie cutter, placing them about 1 inch apart on a cookie sheet lined with parchment paper or a Silpat mat
– Bake for 8-10 minutes, depending on how chewy you like your sugar cookies
– Transfer to a wire rack and allow cookies to cool completely before decorating
– For the icing, mix together sugar, meringue powder, water, and maple flavoring until smooth (about 2 minutes). If icing is too thick, add more water in 1 tsp increments. If too thin, slowly add more powdered sugar. For the outlining, you want the icing to be fluid but still hold a firm peak. For the flooding, add enough water so the peak will sink back into the bowl and smooth out within 10 seconds
– Divide icing and color as desired (I dyed 2/3 of it orange-red and 1/3 golden yellow)
– Prepare piping bag for outlining (I used Wilton #2) and place upside down in a glass with a wet paper towel on the bottom while not in use so the icing in the tip does not dry out. You won’t need much for outlining, since you’re only doing a thin line around each leaf. Place the flooding-consistency icing in bags with a larger tip, or a squeeze bottle (like this one).
– Pipe the outlines first using the thicker icing and let it sit for 30 minutes before going back to flood
– Flood with a bulls-eye pattern of alternating red and yellow (see diagram above), and then use the tip of a offset spatula or toothpick to mix the colors, gently moving back and forth away and towards the center until desired combination .
– While the icing is still wet, go back with the red flooding icing to pipe veins
– Allow cookies to dry over night before packaging or devouring
Happy Thanksgiving everyone!! I’m certainly going to enjoy my break from memorizing things with names like Erysipelothrix rhusiopathiae and Rickettsia tsutsugamushi!


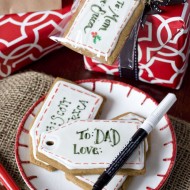
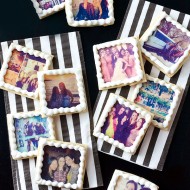






These cookies are almost too gorgeous to eat! Almost.
i don’t know what’s more impressive… your pretty cookies or the Paint skills you used to describe them! haha
Oh, this dish looks fabulous! I love the picture too! If you’re interested, you should submit it to Recipe4Living’s Tasty Thanksgiving Recipe Contest :)
The colours on the cookies are amazing. I love the blending of colours to make them more realistic. Great job!
Wow, absolutely gorgeous!